According to the Environmental Protection Agency, the average American spends 93% of their life indoors. That makes it important to create a living space where you can wind down after a long week. One important component to achieve this is a nice ceiling fan. If you’re eager to get one but aren’t sure how to find the best one for your living room, you’ve come to the right place.
Here are 10 tips to help you select the most stunning ceiling fan for your home.
Your 10 Tips to a Stunning Ceiling Fan for Your Home
1. Consider Your Budget
Before you shop for modern ceiling fans, it’s important to know your budget. For instance, a $100 ceiling fan is a traditional model with a pull chain control, fantastic for starter homes. In contrast, a $300 ceiling has better functions and motor performance with a wide range of ceiling fan styles from which to select.
Also, if you choose ceiling fans outside this range, then you might get handcrafted blades, LED lights, and premium performance. Additionally, there’s an array of styles from modern to avant-garde designs. Moreover, all are perfect for high-end homes and retail spaces.
2. Decide Where to Install Your Ceiling Fan
Outdoor ceiling fans vary from indoor ones because the former is exposed to the elements which affect its performance. Because of this, you must choose a ceiling fan design for a specific location.
For instance, fans with a UL Dry rating have furniture-grade wood blades. They are designed for dry, indoor locations like living rooms or bedrooms. UL Damp rating ceiling fans withstand humidity and water. So, naturally, they work well in bathrooms, laundry rooms, or kitchens.
If you want to install ceiling fans over your patio, get a model with a UL Wet rating as it endures everything from rain to snow. Do you still not understand how a fan works? Then, check out this fan guide.
3. Choose the Right Size
Indoor ceiling fans circulate air in a space, so your fan size must match your room’s. Therefore, first measure the room so you get an idea of which fan size to choose. Then, measure from the floor to the ceiling to figure out the mount type. As a general rule, if your fan is bigger than 300 square-foot, get a fan that’s 52-inches or larger.
Once you have the size, find the best mounting type for the room. For instance, a flush mount is attached to the ceiling and works best for low ceilings.
A downrod mount is fantastic for living rooms or spaces where the ceiling height is over 8-feet. Those with extra high ceilings may need to hang your fan from a longer downrod, so check its size before buying.
4. Consider If You Want to Add a Light
Those who want a ceiling fan with lights must look for a model that comes with a light kit. But, if your room has plenty of good natural light or you already have a light, you don’t need an additional light.
When you get a ceiling fan with lights then you choose between an LED, fluorescent, and halogen bulb depending on your needs.
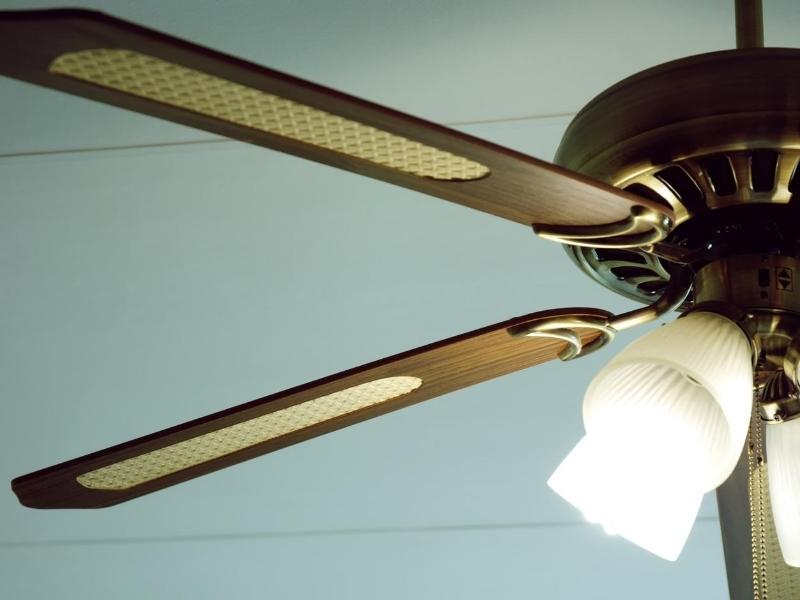
5. Pick a Style
Find a ceiling fan that complements your room’s decor. For instance, antique ceiling fans work best with vintage homes and often have decorative blades.
In contrast, contemporary fans might have a metallic finish with minimal decorations. It’s also possible to get rustic ceiling fans with dark wood finishes and gold accents. This style is perfect for country-style homes.
6. Don’t Forget Ceiling Fan Efficiency
Fans either have a DC or an AC motor. The former produces less heat and consumes less energy than the AC, which makes them a better option for indoor spaces.
If you want energy-efficient fans, find an Energy Star label as they use up 20% less energy and reduce your heating or cooling costs.
7. Consider Control Options
You control your fan’s speed and lighting through controls such as a pull chain. Most standard fans feature chains and are great for rooms that aren’t often in use or in spaces with low ceilings.
The remote control is lightweight and is best for rooms with high ceilings like living rooms. Or choose a fan with a wall control where you can change its speed by pressing a button.
8. Place Your Fan Properly
Fans don’t work to change your room’s temperature. Rather, they cool by creating a breeze. To ensure their effectiveness, install them in spots where you spend most of your time such as over the sofa.
Pro tip: Run your fan counterclockwise in the summer for a cool breeze. In the winter, make your fan go clockwise to push warm air near the ceiling downwards for better distribution.
9. Blades Must Be at the Right Angle
It doesn’t matter how many blades you have but the angle does. For good airflow, the motor and blade should be at a 12- to 15-degree blade pitch for the best air movement. As a general rule, the steeper the pitch then the more air the fan produces.
10. Consider Installing Options
DIY fanatics can swap out their old ceiling fan for a new one but it’s safer to hire a licensed electrician so they can check your wiring too.
Plus, most reputable electricians offer a 30-day installation warranty. So, if your fan needs adjusting in within the 30 days, then, they can help.
Here’s to Your Amazing Ceiling Fan
Now you know how to find the right ceiling fan for your home. Before shopping, measure your room so there’s space for the mount and you know what type of fan to get. Install your ceiling fan in an optimal position and call an electrician to help you install it. Happy shopping!
Did you find this article helpful? If so, check out our posts on everything from DIY home improvement guides to interior design. If you have any questions or suggestions we invite you to leave them in the comments below.
Images Courtesy of Canva.
5 Improvements that Add Value to Your Home
5 Tips for Winter Home Improvements


