DIYer of The Day…

Jenee Simons is our DIYer of the day. Jenee refers to herself as, just a handy dandy crafty chick who loves refurbishing old things, it puts her in her happy place.
Jenee found this old discarded piece of furniture along the side of the road in front of an apartment building. She asked a guy that lived there if he knew who it belonged to and he told her it had been dumped and left in the rainy weather for two weeks.
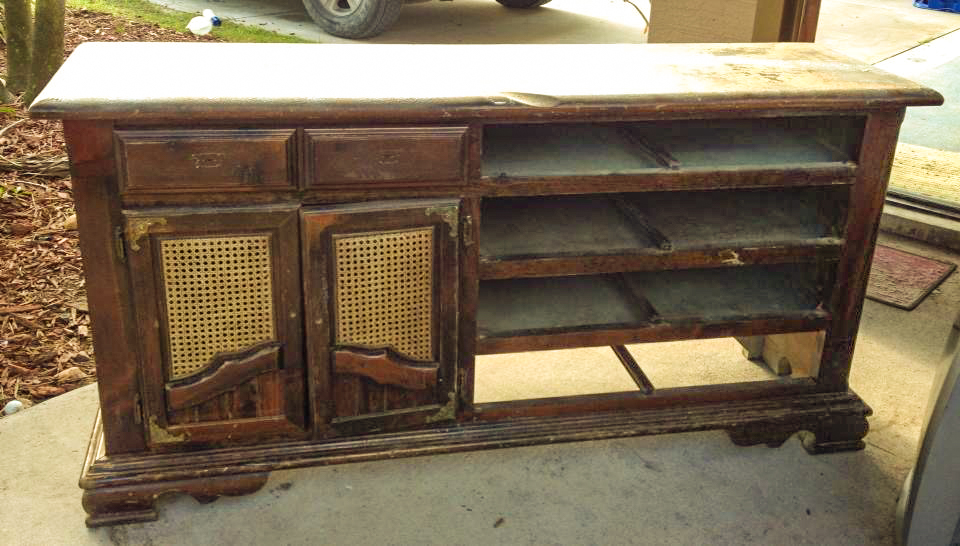
It was solid wood and she was actually amazed that it had not been destroyed by the weather and knew it must have had good bones and was worth trying to rehab.
Step 1
Remove the drawers and take off the existing doors. The existing doors were much too French Provential for her taste. She was wanting more of a cottage looking piece and decided to revamp the doors by removing the old cane panels. Each corner of the door had a decorative metal embellishment, which she was able to pop off. She then needed to remove the horizontal rails and verticle wood paneling in the doors, which was held in by a frame on the inside of each door. By removing the screws the center panels all came out.
Step 2
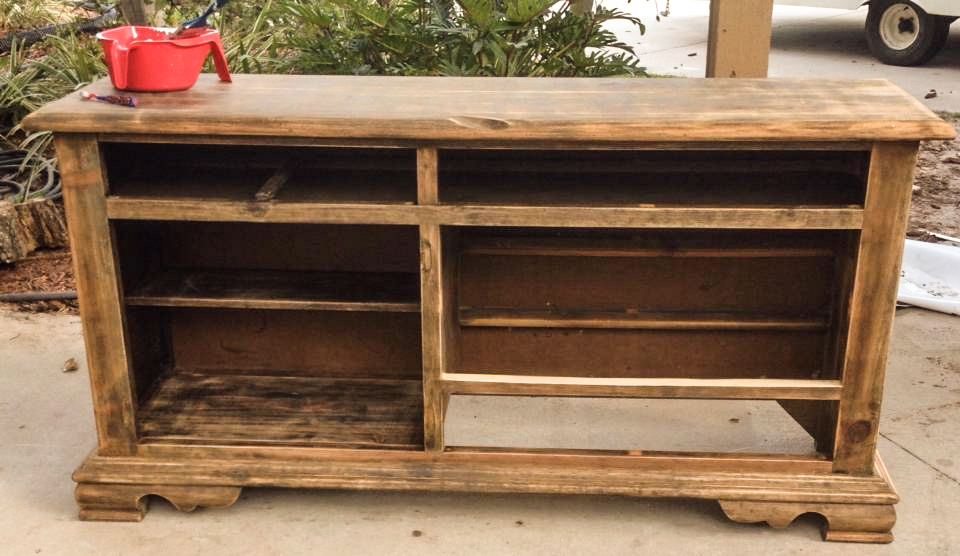
She wanted to convert some existing drawers to shelving so the next step was to remove the pieces that were the track for the original drawers by using a small Phillips head screwdriver. To cover the holes she used birch wood skins, which is a closed grain wood and better for the painted finish she was going for.
The missing bottom was replaced easily due to there being a lip that would accept a 1/4″ board which she sized and fit in like a piece to a puzzle.
Step 3
After transforming the bones of the old piece of furniture it was time to begin the process of stripping the old finish off. She lightly sanded using an electric hand sander with 220 sand paper and successfully took off the old finish.
Step 4
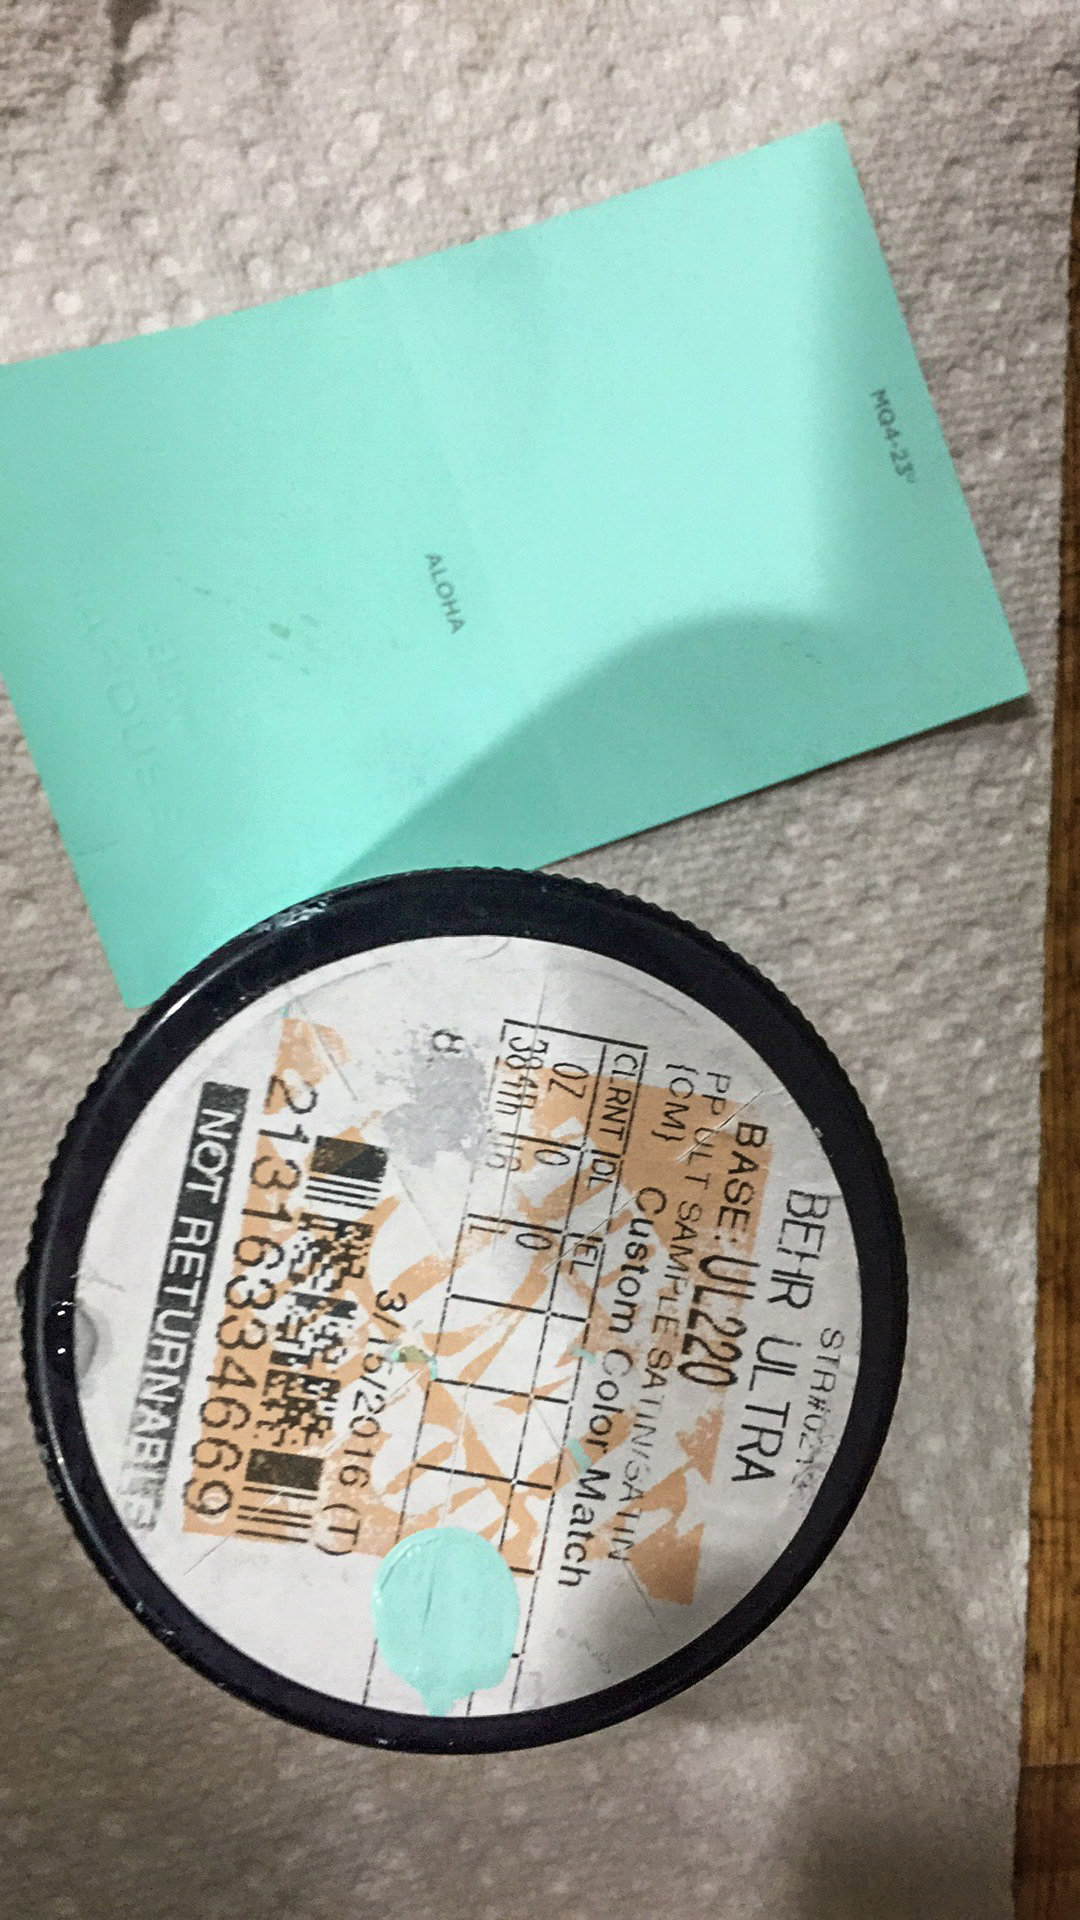
It was ready for painting and Jenee chose BEHR Premium Plus Ultra Flat White as her base color. She gave it time to dry and then applied her color, BEHR Premium Plus Ultra Flat Aloha.
Step 5
To add the character to her cabinet she sanded the corners and some of the edges to give it a worn weathered appearance. This technique is quite personal and depends on the look you are trying to achieve. This piece was to have a shabby chic feel to it and so she went for heavy distressing. She purchased her storage baskets from a local craft store which added to her shabby chic vibe.
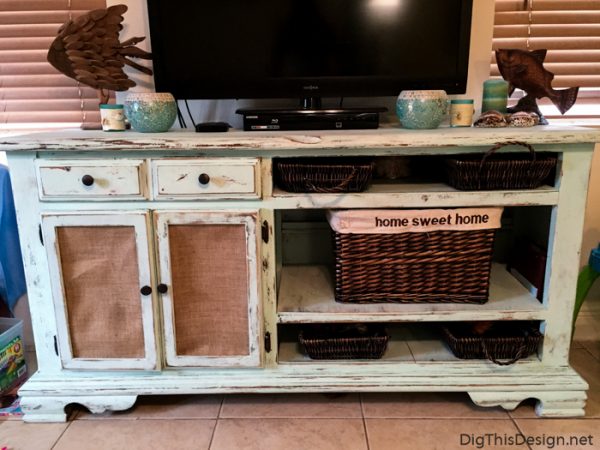
Her finishing touch was oiled rubbed bronzed knobs she picked up at Lowes.
What would have been a discarded, unwanted piece of furniture ended up in her daughter’s home, a cherished gift from mom.
For more DIY inspirations:
DIY – HOW TO MAKE AN OLD CHAIR INTO A STATEMENT PIECE
5 LOW COST HOME STYLING TIPS TO DIY
13 FREE RESOURCES FOR THE HOME IMPROVEMENT DIY-ER
EASY DIY DECOR – RE-PURPOSE YOUR T-SHIRTS INTO A DECORATIVE PILLOWS


