When you build your own patio, different ideas and concepts might inspire you But, sometimes our capabilities and limitations might stop us from moving forward. But, today we have a guest writer from “Simply Sheds” to tell you exactly how to create the dream patio you desire.
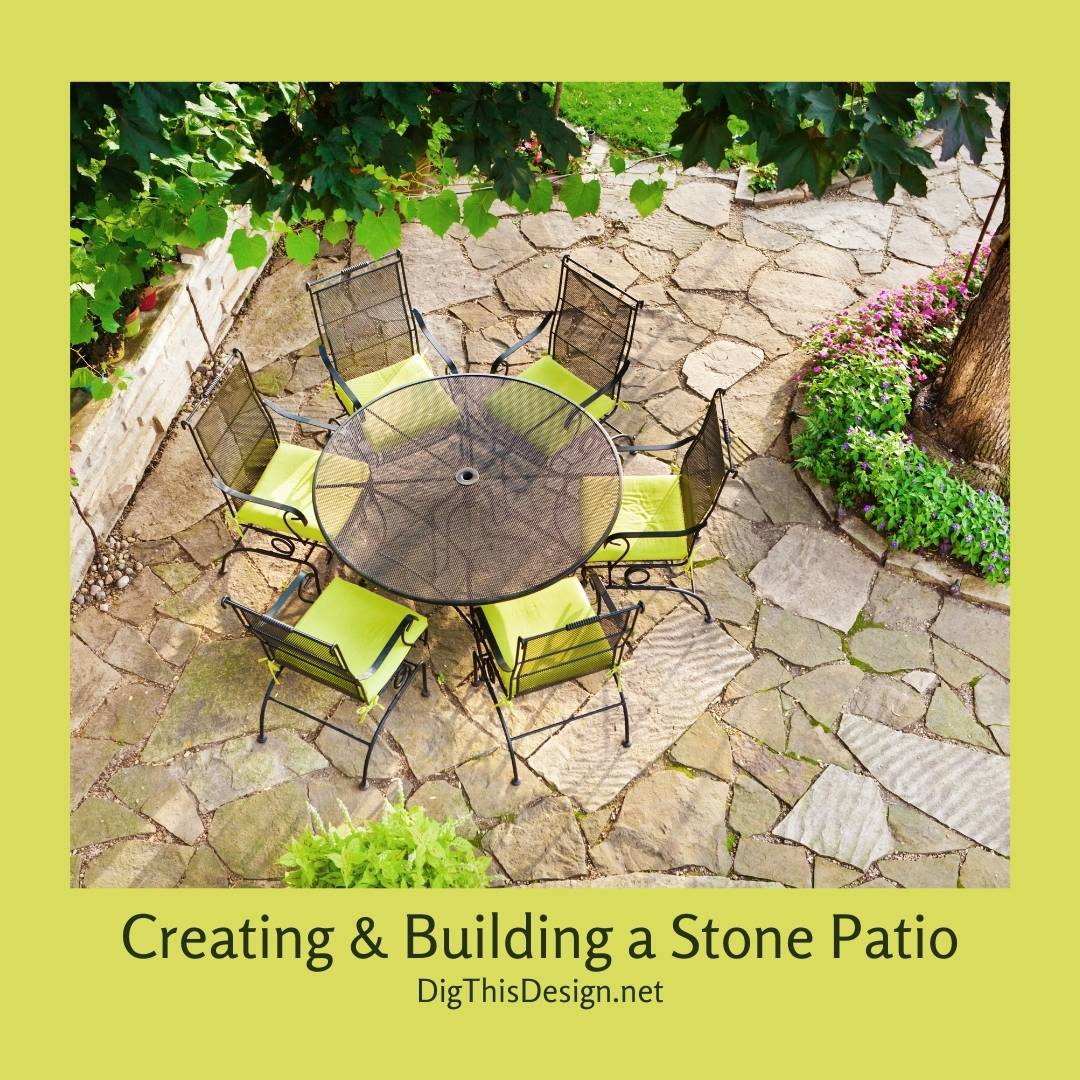
How to Build Your Own Stone Patio
Often when looking at our home, we decide that it could use a couple more additions in order to really make it look and feel like the home we’ve always wanted. Some may add one more floor or two, while others may add a backyard shed to enhance the landscape but more often than not, others would consider adding a deck or a patio to add more value to their homes.
Extra Space for Entertaining
Most of the people I’ve spoken to however, prefer to add a patio primarily because they want an extra place in the house where they can hang out during warm weather, when it can feel a little stuffy being inside the house, especially at night.
They also want a place to entertain guests in especially if they don’t want drink spills or stains on the carpet in the living room. A patio after all, is an extra place in the home that feels cozy and is meant to be somewhere you can unwind and relax after a long day at work. The perfect outdoor living space.
It’s All in the Patio Design
If you want to add a patio to your home but feel that it may challenging to do or that it may be a budget-busting project you shouldn’t consider, think again. A casual, free-form design should be easy enough even for those who haven’t done it before as it allows you to relax and not have to worry about measuring or cutting.
Anything goes with this kind of design and all you need to come up with is your creativity so here are the steps to get you started:
• Plan the Site
Determine the coziest spot to build your patio on, along with a few other considerations like shade, slope and drainage. If you want shade but don’t have it, you’ll need to consider planting shady trees and adding patio covers like those sold at Simplysheds.com.au to keep out the sun. As for drainage, make sure you check beforehand for any possible obstacles like tree roots and underground utility lines and lastly, make sure that the ground you build your patio on slopes at about ¼ inch per foot, no more, no less.
• The Right Materials and Stones
As with soldiers preparing for battle, you’ll need to make sure you have the proper and right materials available for your project like sand and gravel, landscape fabric and of course the stones. The landscape fabric stabilizes the soil underneath the gravel base by keeping them apart while allowing water to drain. Make sure you use the widest landscape fabric you can find.
For the foundation of your patio, you can use limestone or any material as long as the granules are about ¾ inches in size to powder, angular and not smooth. This will allow the fill to be tightly packed for a firm base that allows water to drain through it. Depending on the texture of your soil, you will need gravel layer that is about 4-10 inches thick but if you have a sandy soil, you will need less. It is also prudent to note that gravel is sold by the ton or cubic yard, with one cubic yard covering about 50 square feet at a 6-inch depth by the time it’s compacted.
And last but not the least, you’ll need coarse washed sand to spread over the gravel in 1-inch layers to form a setting bed for the stone and brick and to fill the cracks between them.
• Flatten and Pack
Next, it’s time to start flattening and packing the base and moving tons of dirt. Before you do this, you need to mark a string line across the center of the patio, particularly in the direction you want the water to drain, with the string sloping 1 inch for every 10 feet. You will need this string as well to gauge the depth of the hole as you dig and so you can set the slope of the compacted base.
At this point, you can start digging about 10 inches of dirt and place the excess in a designated fill. You may need to consider building a raised planter bed to accommodate the excess dirt or hire an excavator with a skid loader and dump truck to dig the hole and haul the dirt away. You can also consider a large trash bin about 10 cubic yards and renting a wheelbarrow to haul the dirt into it. Another tip to remember: the soggier the soil, the more gravel you will need for a more stable base.
Before you fill the hole you dug, remember to roll out the landscape fabric, extending it as far it would go beyond the patio, using spikes to hold it in place. Next, spread and tamp down two layers of gravel that are about 2-3 inches thick then establish a perfectly flat surface before tamping it down one last time.
• Set the Stones
What you’ll need to do next is lay your stone border by measuring the thickness of a few stones to get an average and then comparing it to the thickness of the bricks you’re using. The goal is to get the stones and brick even on top so you need to adjust the depth of the sand bed to compensate for any differences in thickness. Spread out the stones so you can choose a great shape and limit the gaps to about 1 inch.
• Lay the Bricks
Now you’ll need to lay the bricks. Start this by screeding out a layer of sand so the bricks end up about 3/8 inches above the surface of the stones. This makes sure the bricks are at par with the stone when you run a compactor over it.
To keep your bricks running straight, snap chalk lines directly in the sand. If going for a running bond pattern for example, you’ll only need a baseline and two lines perpendicular to the baseline, offset by half the width of a brick. To cut the border bricks, you can rent a masonry saw with a wet-cutting diamond blade and don’t worry if they don’t fit perfectly because you can always plant ground cover in the large gaps to make your patio more natural looking. Once you’ve finished setting the bricks, run a compactor over them to create a level surface.
• Spread Sand to Put the Bricks and Stones in Place
Before spreading the sand, you must pack dirt around the perimeter of your patio then sweep sand into the cracks and never sweep sand into the cracks if it is damp. Finish up by doing some landscaping around the patio such as planting ornamental trees to create a welcoming atmosphere or adding some tables and chairs to make it an inviting space.
Now, not only do you have a place where you can freely entertain your guests and family for any kind of gathering, you also have a place where you can enjoy total privacy, read a good book or enjoy a great meal.
Jesse Burns contributed this article from “Simply Sheds”
About The Author: My name is Jesse Burns and I am a certified rock star who’s also into building sheds and have done a lot of shed-building projects for friends. I also blog for a company called SimplySheds which is one of Australia’s leading sheds and garages company.
Images Courtesy of Canva.


