Do you have an old ceiling fan in your home that’s on its last legs? There’s no need to hire an electrician to replace it, because you can easily replace a ceiling fan. So, don’t shy away from this fairly straightforward process. Presumably the electrical wiring is already in place, because you have an existing fan. You probably also have a fan-rate electrical box and a mounting brace to keep your ceiling fan fixed to the ceiling. The rest is just a matter of swapping out the old fan for the new. If this is something you want to DIY, we invite you to continue reading for your guide to replace a ceiling fan yourself.
6 Steps To Replace A Ceiling Fan Yourself
1. Cut off the power to your ceiling fan.
Before you open up your old ceiling fan and start messing with the wiring, you need to make sure that you’ve turned off the power to the circuit at the breaker. Test that the power by flipping on the light switch in the room. However, keep the light switch flipped off while you’re working, as an extra safety measure.
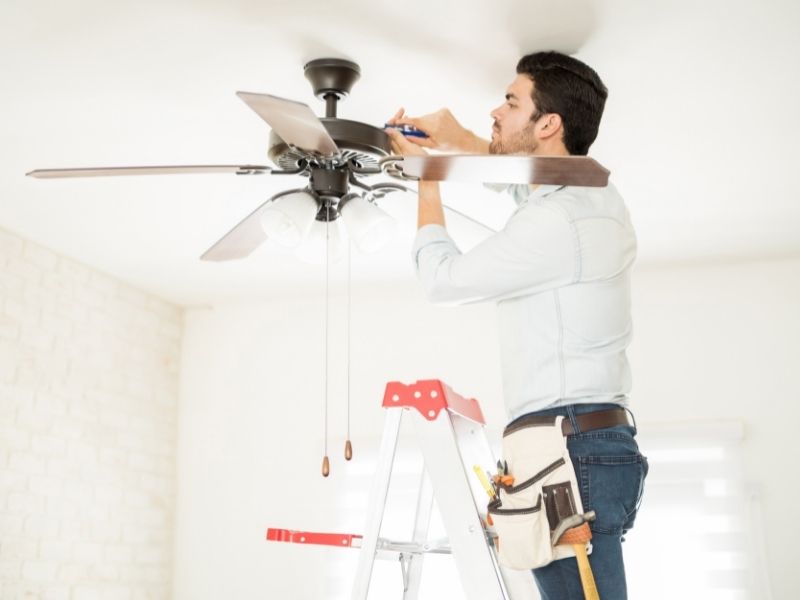
2. Remove the old fan from the ceiling.
Climb up on a ladder and remove the mounting screws from your fan’s canopy. Of course, you may need an extra pair of hands to help you carefully lift the old fan down to the floor. Also, remove the old fan’s ceiling plate.
3. Verify the proper hardware mounting in present.
Ceiling fans are a little heavy, so make sure your fan is securely anchored into a ceiling joist or into a mounting brace between the joists. Some homeowners go into the attic above the room where they’re hanging the fan. Then, they mount a length of two-by-four lumber between the joists to provide a fan mounting base. However, some use an expanding metal bracket or attach the fan to the joist itself.
If your fan isn’t secured to a joist, you can cut a hole in your ceiling under the joist and use a ceiling medallion to hide the old hole. Remember that you must install a fan-rated, pancake electrical box, secured to the joint with one-and-a-half-inch screws.
If you’re not changing the location of your fan, that’s fine — it’s certainly easier. Make sure the electrical box is fan-rated. It should be labeled as such; make sure it also offers the appropriate weight rating for your fan. Once you’re sure you have the right electrical box, you can secure your new fan’s ceiling plate to the box. Pull the wiring down through the ceiling plate.
4. Assemble the fan motor on the floor.
Put your fan motor assembly together on the floor, following the fan’s assembly instructions. Feed the wires from the fan motor up through the downrod, and screw the downrod into the motor housing, taking care not to wipe off or remove the factory coating on the threads. Use a wrench to tighten the locking nut that secures the downrod to the motor. Feed the wiring through the fan canopy and place it over the downrod, on top of the fan motor. (Keep in mind that not all fans have a downrod — hugger ceiling fans, for example, mount flush with the ceiling.)
5. Connect the wiring and install the fan motor.
Most fan motors have a hook on them so you can hang the motor assembly from the ceiling plate while you’re connecting the wiring. You should have three wires coming out of your ceiling — a white one, a black one, and a green or bare one. The white and black wires are live and should be connected to the wires of corresponding colors coming out of the motor housing — white to white, and black to black. The green or bare ground wire should be connected to the corresponding wire coming out of the ceiling, as well as wrapping around a ground screw in the electrical box.
Once you have the wiring connected and secured with wire nuts, you can swing the fan motor up into place and attach the canopy to the ceiling plate with the provided hardware.
6. Attach the fan blades and light fixture.
With the fan motor securely attached to the ceiling plate and wired up, all that’s left is to attach the fan blades and wire up the light fixture, if your new fan has one. First, fasten the blade irons to the blades, and then attach the blades to the fan motor.
Most ceiling fan light fixtures just plug into the motor housing, but if yours doesn’t, you’ll have to connect the wiring yourself. Do it the same way you did the fan motor wiring — white to white, black to black, and green or bare to green or bare. Use wire nuts to secure your connections. Add the light bulbs and light bulb covers, and you’re ready to use your new fan!
In conclusion.
If you have any questions or suggestions, we always love to hear from you in the comments below. Also below are links to more fantastic articles about ALL things DESIGN for your home or business.
Images Courtesy of Canva.
Other Posts You Might Enjoy:
Tips for Keeping Your House Well-Ventilated and Cool In Summers
How To Create An Amazing Summer Ready Patio


