One of the tastiest and most distinctive dishes to come out of Japan, the infinitely fashionable and equally tasty dish has grown to become a popular favorite in specialist eating places around the World. What adds to the allure of a typical Sushi restaurant is that most of them operate an open kitchen where diners can watch the “Sushi rollers” in action, dexterously creating culinary masterpieces at seemingly breakneck speed. But is it possible to make delicious sushi at home?
Looking at these oriental craftsmen in action, the average home-based cook might decide that cooking sushi at home is an impossible dream. However, with an ample dose of patience and determination, they are cooking up a successful sushi dinner for family and friends.
There are a few stepping stones involved in learning to become a competent Sushi chef, and here is your guide to making delicious sushi at home.
Your Guide to Making Delicious Sushi at Home
The Proper Rice
The first thing to realize is that sushi rice forms between two-thirds and three-quarters of a typical sushi dish. Known in Japanese as “Shari,” it is always recommended that Short or medium-grain white rice is used. If you want to make life easy for yourself, you can always find an oriental food store or look for packets of rice, labeled “sushi rice” or sometimes under the name of “Calrose” rice in your local supermarket. With more and more people preparing the dish at home these days, you stand a good chance of finding it.
Stage One – Preparations
Now that you have the rice that you need, it’s time to get started with the preparations, Stage one is to rinse the rice thoroughly. Once that has been done, the rice should be placed in a steam oven, or better still a rice cooker, with equal parts water.
Stage Two – Transfer Rice to Sushi-okes
Once the rice has been successfully cooked, it can be transferred to any kind of unvarnished wooden bowl that is large enough to hold the rice you will be preparing. These bowls are known as sushi-okes, and make a tremendous difference to the taste and texture of the Shari rice. If this is your first attempt at preparing Sushi and you don’t want to involve yourself in too much expense, you can always use a glass or ceramic bowl, but never any kind of metal bowl. However, for the long term, an investment in a sushi-oke is almost a must and will not break the bank.
Stage Three – Prepare Tezu
The next step is to prepare a vinegar solution known as Tezu to be added to the rice. This is where the budding Sushi chef can use a little “carte blanche” by deciding to use either Japanese “Sake” or another form of rice wine mixed with specially prepared rice vinegar, which can be picked up in any supermarket or specialist food store. For the more conservative there is always the option of making the vinegar solution using rice wine with just a little sugar and salt added. Whatever the combination, the ingredients need to be added together in a saucepan and cooked over low heat after which the newly prepared rice vinegar mixture should be left to cool to room temperature.
Stage Four – Pour Tezu over Rice
The next tip is to carefully pour your Tezu vinegar mixture over the rice gently and carefully so that the rice can totally absorb all of the vinegar. This is a crucial stage in the preparation of the sushi, because if the vinegar is not distributed with caution, the Shari will become lumpy and mushy. The ideal Shari rice for a Sushi dish should have a crisp and shiny appearance.
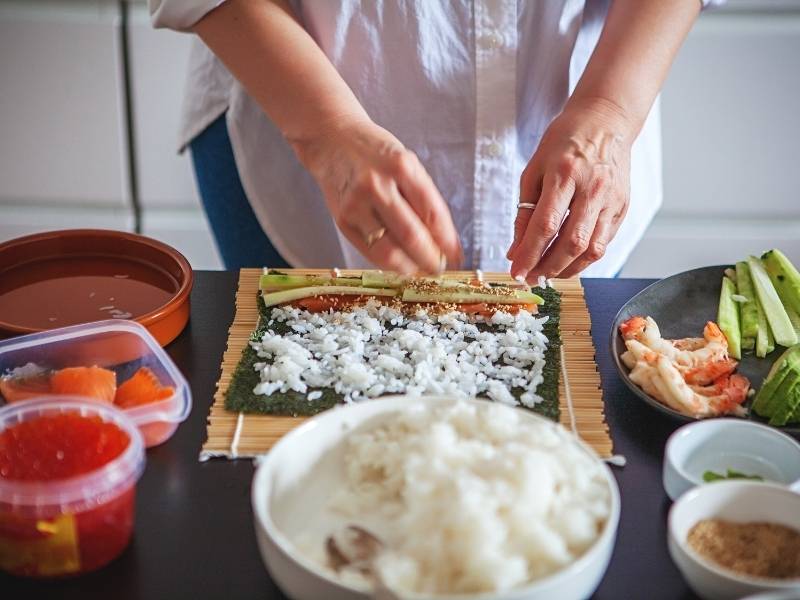
Stage Five – Prepare the Sushi
After the Shari rice has been successfully prepared, the next step is to prepare the Sushi itself. To the uninitiated, there are actually two main types of sushi to choose from. The first goes by the name of “nigiri-zushi”, which is the oval-shaped hand-formed variety that can be prepared with a variety of toppings, although usually either raw or cooked seafood. The second variety goes by the name of “makizushi” which is the Shari rice combined with a choice of various seafood and vegetables, wrapped in edible seaweed known as “Nori”. The “Nori” does the job of holding the Shari and the other ingredients in place so that they can be sliced into finger portions.
For the beginner, preparing either of these dishes will be a challenge. However with a little time, patience and dexterity of hand the budding Sushi chef should soon be able to come with some fairly tasty examples of this ever popular Far Eastern dish.
Andrew Black, Sushimachine.com.au
###
About the Author: Andrew loves blogging about Japanese cuisine and food in general. Over the last 4 years, Andrew has been working in the food industry distributing sushi machines and sushi equipment. Allan has contributed numerous articles on food blogs and websites.


